 Purdue University Libraries, WALC 3007
Sticker Printing for Purdue Students
Free Purdue
Stickers, Minus the Prep
For Purdue students: use the calculator/manual guide or install the free AI skill. Check the current Knowledge Lab guide before submitting.
Purdue’s Knowledge Lab cuts vinyl stickers for free. Use this guide and AI skill to prepare files for review; the Lab decides approval.
The printing is free. The file prep is what costs you.
The external problem
The Lab requires an Illustrator file with a cut path stroked in one specific magenta spot swatch, at 18 in wide, in CMYK, on its own layer, saved as a particular flavor of PDF. Most students don’t own Illustrator, so that means a trip to a campus lab machine.
The internal problem
You wanted a sticker, and instead you are reading a spec sheet about raster effect resolution. The rules are all findable and none of them are interesting, and it is never clear whether you got them right until the denial email arrives.
What's at stake
Four to six hours on the first attempt, or the far more common outcome: you read the guide, decide it isn’t worth it, and the free printer goes unused for another semester.
Idea to booked slot, in six moves.
The pipeline that produced four approved BuildPurdue designs in May 2026, two of them printed.
Intake and Rules
Text, logo, physical size, finish. Then the copyright check and the roll-length math, because that is where submissions get denied and where your monthly allotment gets used up.
Design the SVG
Built on a real physical-size skeleton at 300 units per inch, self-contained in one file. Six finished BuildPurdue designs and a neutral template ship with the skill as starting points.
Render at Size
A render script drives headless Chrome to an exact-size transparent PNG, 300 DPI stamped and verified non-blank. You see it and approve it before anything else happens.
Package the Files
A dated folder with final PNGs, source SVGs, and a notes file carrying size, finish, quantity, and the FirstName_LastName_Sticker name the Lab asks for.
Illustrator Prep
If a prepped PDF is needed, it walks the playbook step by step, including the traps from the real session: embed on place, lock the scaling chain, cut path on its own layer.
Book and Submit
Opens the Lab’s booking page, sizes the slot to your material length, and walks the request form. An email fallback with a ready-to-fill template is there if the form fights you.
What this is
Purdue Libraries offers a sticker printer in the Knowledge Lab.
The Knowledge Lab sits on the third floor of WALC and runs a Roland printer-cutter. You bring a design, they print it on vinyl and cut it to your shape, and you walk out with real die-cut stickers. It costs nothing. Most students never hear about it, and the ones who do usually bounce off the file requirements.
Cost
$0
Free for students. No commercial use, no mass production.
How much
18 × 36 in
Of material per month, per person or per club. An idealized 2-inch grid fits 162; gaps and cutting margins reduce the usable count.
Finishes
3
Glossy, matte and transparent in the official material guide.
Where
WALC 3007
The Knowledge Lab, inside Purdue Libraries. Booked slots only, no walk-ins.
Your allotment is measured in length, not stickers, because the operator tiles copies across the roll and prints whole rows. Move the sliders and see what your size actually buys.
Your sticker
Free every month
2 × 2 in stickers, at no charge.
The math
18 ÷ 2 = 9 per row
36 ÷ 2 = 18 rows
9 × 18 = 162 stickers
Book this long
for 50 stickers.
6 rows × 2 in = of roll. The form asks for length, not count.
Enter exact values, then press Enter or leave the field. Sizes round to the nearest 0.25 in (1 to 6 in); quantity is limited to the calculated maximum. Copy the browser URL to share this calculation.
Roll is 18 in wide, 36 in of length per month per person or club, materials free. Straight from the Lab's Start Here page.
Official details live in the Knowledge Lab guide, and slots are requested on the booking page. Also see the file preparation and copyright pages. Check the current Knowledge Lab guide before submitting.
Why almost nobody does it
Free is not the same as easy.
Five things sit between a sticker idea and a sticker. None of them are hard on their own. Together they are an afternoon.
You have to use Adobe Illustrator
Not “we recommend.” The guide says file prep must be done in Illustrator. Most students do not have a Creative Cloud license, so the practical answer is a Purdue IT lab computer — the instructional lab list tells you which ones have it. In practice you walk to WALC, sit at a lab machine, and learn Illustrator well enough to do the job in one sitting.
The spec is unforgiving
Miss any one of these and the file comes back. The cut color is the one that catches everybody: the printer looks for a single named magenta spot swatch, and it lives in a file you download from a Google Drive link inside the guide.
| Item | What it has to be |
|---|---|
| Document | Illustrator file. Width 18 in (the printer default), height set by your design, color mode CMYK, raster effects High (300 ppi). |
| Cut path | A vector outline of every sticker, stroked with the magenta “CutContour” swatch out of the official Roland VersaWorks swatch library. The printer recognizes that one swatch and nothing else. |
| Cut path layer | Move the cut outline to a new layer, as shown in the official file-prep instructions. |
| Scaling | Uniform only. The chain icon in the Transform panel stays locked, or your sticker prints stretched. |
| Artboard | Trimmed tight to the art. Shift+O and drag, or Window → Artboard → Fit to Selected Art. |
| Save format | Save As → Adobe PDF with “Preserve Illustrator Editing Capabilities” checked. |
| File name | FirstName_LastName_Sticker. Exactly that shape. |
Still with us?
Skip to the easy wayIrregular outlines need more preparation
Simple circles and rectangles have their own official tutorial. A shape that follows your artwork’s real edge, or a chunk of text with no box around it, means tracing a silhouette by hand:
- 01Duplicate the artwork
- 02Image Trace the copy on the Silhouettes preset
- 03Expand
- 04Ungroup
- 05Release
- 06Keep the outermost shape, delete everything else
- 07Shift+X to swap fill and stroke
- 08Duplicate the outline — one copy clips, one copy cuts
- 09Align the first outline over the art and Make Clipping Mask
- 10Optionally add an Offset Path border; the official guide recommends it for detailed edges
- 11Align it, stroke it with CutContour, move it to its own layer
- 12Resize both together, trim the artboard, save the PDF
No walk-ins, and the approval is a round trip
You request a print time and submit the design for approval in advance, in the same form. The booking page says no same-day printing and gives 1-2 business days for a response. Groups cannot bypass their monthly allotment through separate individual requests. A denial comes back with a list of fixes — which means another Illustrator session and another submission.
Copyright is enforced, and Purdue’s own marks count
Original works only. Every Purdue trademark — the Unfinished P, the Boilermaker Special — needs permission from Purdue Trademarks and Licensing before it can go on a sticker, and files do get denied for infringement. The Lab may permit exceptions case by case; ask before assuming a logo will be accepted or rejected.
What it actually costs you
Four to six hours, the first time through.
Spread across designing something worth printing, the trip to a lab machine and the Illustrator session on it, and the booking round trip. That is my number, from doing it. It is why the free sticker printer at a university of 50,000 people is not busy.
Have you had enough?
Skip all the workWhat it produced
Six designs for BuildPurdue. Two of them are stuck to things.
Every one of these was designed through the pipeline and printed or approved at the Knowledge Lab. Two by two inches, glossy, black with a gold keyline, which is the finish that suits a dark design.
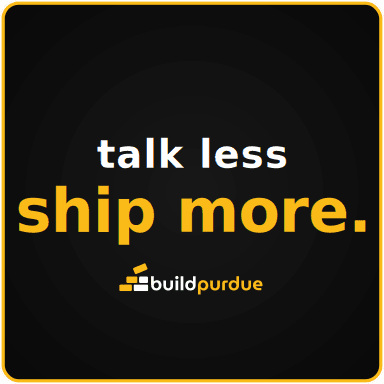

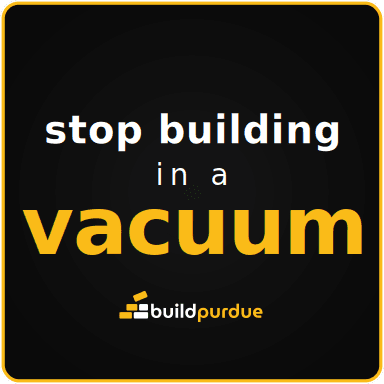
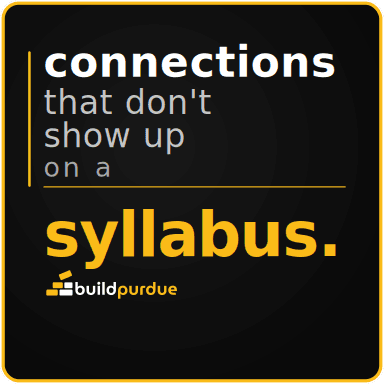
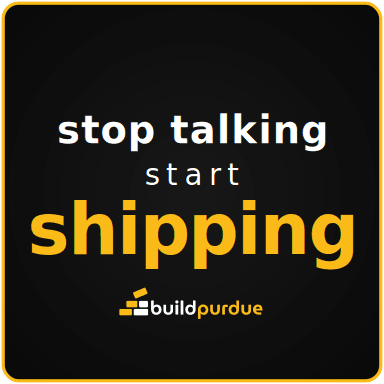

Designed with the skill’s pipeline, printed at the Purdue Knowledge Lab. Two were accepted from emailed PNGs with little or no editing; the rest cleared design approval.
No AI required
The short version, if you would rather just do it.
This is the whole official process condensed, with the parts that cost me time called out. It works. Set aside an afternoon for your first one and it will go faster after that.
Check your idea against the rules first
The Lab normally accepts original works and may permit case-by-case exceptions. Seek permission for trademarks through their owner; Purdue directs logo requests to Trademarks and Licensing. Ask the Lab about exceptions before submitting. No commercial use.
Work out your material length
The roll is 18 in wide. In an idealized zero-gap grid, fifty 2 × 2 in stickers fit nine across and six rows, using 12 in of roll; cutting gaps and margins can increase that length. Your monthly ceiling is 36 in. Use the calculator to explore dimensions and spacing before booking.
Find an Illustrator machine
Adobe Illustrator is free on Purdue IT lab computers. The instructional lab list tells you which ones. WALC has them, which is convenient, since that is where you are printing.
Download the swatch library
Grab RolandVersaWorks.ai before you start. Window → Swatches → the library icon at the bottom left → Other Library → open that file. CutContour appears in your swatch panel.
Build the file
New file at 18 in wide, CMYK, raster effects High. Place your art. Size it with the chain locked. Draw the cut path, stroke it CutContour with no fill, move it to its own layer, trim the artboard.
Save it the way they asked
Save As → Adobe PDF, keep “Preserve Illustrator Editing Capabilities” checked, name it FirstName_LastName_Sticker. Confirm the Lab's current upload requirements.
Book a slot and submit
On the booking page, pick a green slot sized to your material length, upload the prepped PDF and the original image files, and choose your finish. Then wait for the approval email. A denial comes back with the fixes it needs.
Seriously, you don’t have to do any of this.
Let the skill do itThe slot you book is sized by the length of roll your job uses, not the number of stickers. The Lab recommends the booking bands below; these are estimates, not guaranteed print times.
| Material length | Slot to book |
|---|---|
| 12 in or less | 30 min |
| 12 to 24 in | 60 min |
| 24 to 36 in | 90 min |
- Total material inside the 18 × 36 in monthly allotment. Groups share one allotment and cannot bypass it through individual requests.
- Original work under the Lab policy; seek permission for trademarks and ask the Lab about case-by-case exceptions.
- Not for sale, not mass production.
- Name the PDF FirstName_LastName_Sticker.
- Follow the current booking form's upload fields.
The official LibGuide. The official policy source takes precedence over this guide and archived references.
Where the 18 × 36 in allotment and the booking durations are stated.
LibCal. Where you request a slot and submit the design for approval.
Which lab computers have Adobe Illustrator on them.
The .ai file the CutContour swatch lives in.
WALC 3007. knowledgelab@purdue.edu, 765-496-1883.
The Lab changes its form and its guide from time to time. If anything here does not match what you see, the official guide wins.
Reference library: The official guide, distilled and actually used.
Purdue’s sticker LibGuide is spread across seven pages, a video, and a Google Drive download. It is archived here in full, reduced to the rules that decide whether a file gets approved, and paired with the design system and the notes from a real print session.
Supporting reference files follow the practical guide. Archived source material and author workflow notes are not a current policy certification.
01 Official RequirementsThe Lab’s hard rules, the full file spec, booking durations, and the finishes.
Reference
Official Requirements
Hard rules
- No walk-ins. A print time must be requested AND the design submitted for approval in advance: https://calendar.lib.purdue.edu/space/182313
- Material roll is 18 in wide. Monthly max is 36 in of roll length, so the monthly allotment is 18x36 in per individual OR per club/org (a club counts as 1 person; members may not split submissions to get more, penalty is loss of privileges).
- Free, but no commercial use and no mass production.
- Original works only (copyright). All Purdue trademarks (Unfinished P, Boilermaker train, etc.) need permission from Purdue Trademarks and Licensing. Files get denied for infringement. Questions: Knowledge Lab manager Patricia Swanson, paswanso@purdue.edu.
- File prep must be done in Adobe Illustrator (available free in Purdue IT labs; list at https://it.purdue.edu/facilities/instructionallabs/index.php).
File spec (what the submitted file must contain)
| Item | Requirement |
|---|---|
| Document | Illustrator doc, Width 18 in (printer default), Height = design height, Color Mode CMYK, Raster Effects High (300 ppi) |
| Cut path | Vector outline of each sticker, stroked with the magenta "CutContour" swatch from the official Roland VersaWorks.ai swatch library. The printer recognizes ONLY this swatch as a cut line |
| Cut path stroke width | "0.1" per the official video, which never states a unit — Illustrator's stroke unit (Preferences > Units > Stroke) is points by default and independent of document inches, so read it as 0.1 pt. The printer keys off the CutContour swatch, not the width, so this is not load-bearing |
| Cut path layer | On its own separate layer, above the artwork layer |
| Fill of cut path | None |
| Scaling | Uniform only (chain/link icon locked in Transform panel) |
| Artboard | Trimmed tight to the art (Artboard tool Shift+O, or Window > Artboard > preset "Fit to Selected Art") |
| Offset path | Optional border, recommended for irregular/text edges; guide shows 0.05-0.17 in examples |
| Save format | Written guide: Save As > Adobe PDF with "Preserve Illustrator Editing Capabilities" checked. Video: "High Quality PDF" preset. Either PDF flavor has been accepted |
| File name | FirstName_LastName_Sticker (e.g. Jane_Doe_Sticker) |
| Multiple designs | Allowed in ONE PDF if each sticker is individually prepped; they recommend limiting how many at once. One copy per design is enough — the print operator duplicates in software |
- Roland VersaWorks.ai swatch library (also saved at
../assets/RolandVersaWorks.ai): https://drive.google.com/file/d/1_BBz8jbD3d8bdIdvzorU0P5Ob2wI5YSI/view?usp=sharing - When submitting the booking form, upload BOTH the prepped PDF and the original image files (per the video).
Booking time to request
- <= 12 in of material: 30 min
- 12-24 in: 60 min
- 24-36 in: 90 min
(Rule of thumb from the video: 30 min per 12 in.)
Materials / finishes (chosen on the request form)
- Glossy (shiny) — best for bold dark designs, what Elliot used
- Matte (flat)
- Transparent (clear, some shine)
- Heat Transfer (fabric) — appears on the form though not on the materials page
Visual references (archived in `guide-images/`, indexed in its INDEX.md)
- Offset-path width examples 0 to 0.17 in:
1_Offset.jpg…6_Offset.jpg— show these when choosing a border width - Shape categories:
Circle.png(geometric),Irregular.png,Irregular-text.png - Size frame of reference (1-3 in):
StickerSizes-outlined.png - Finishes:
Glossy.png,Matte.png,Transparent.png— show these when choosing a material
Sticker shape categories
- Geometric (circle/rectangle): simplest prep — draw a Rectangle/Ellipse cut path over the art. Video transcript:
raw-guide-text/geometric-shapes-video-transcript.txt - Irregular (detailed edges) and Text: full Image Trace silhouette workflow (see
illustrator-playbook.md)
Contacts
- Knowledge Lab: knowledgelab@purdue.edu, WALC 3007, 765-496-1883, https://lib.purdue.edu/knowledgelab/
- Manager: Patricia Swanson (she/her), paswanso@purdue.edu
02 Design SystemColors, type, the vertical-centering layout algorithm, and the cut-path caveats.
Reference
Design System
Technical skeleton (every sticker)
<svg width="2in" height="2in" viewBox="0 0 600 600" xmlns="http://www.w3.org/2000/svg">
- 600 units / 2 in = 300 DPI equivalent; 1 unit = 1/300 in. For other sizes keep 300 units per inch.
- Draw order: (1) white die-cut backing
rx=28full canvas → (2) dark field#0A0A0Ainset 5,rx=24→ (3) subtle radial gradient overlay clipped to the same rect → (4) single gold ringstroke=#fabb18 stroke-width=5 fill=none. - The white 5-unit inset ring IS the intended die-cut border. No cut-contour layer lives in the SVG; that happens at the Illustrator/PDF stage (or lab staff add it).
Cut-path caveats (read before promising edge geometry)
- The white keyline is only 5 units = 0.0167 in ≈ 0.42 mm — at or below the cutter's registration tolerance, so a cut flush to the art edge can nick the gold ring on one side. Expect that, or add margin.
- The art silhouette is a ROUNDED rect (
rx=28≈ 0.093 in). If prepping in Illustrator, draw the cut rectangle with matching rounded corners (or apply a 0.05 in offset path); a plain square cut leaves transparent-cornered vinyl. The square-rectangle cut described in the playbook is what lab staff effectively handled in 2026 — the exact Illustrator recipe was never tested by us against these files.
Colors
- Gold
#fabb18— MUST match the logo's gold;#F5A623was tried and visibly clashed. Always sample the logo, never assume. - White
#ffffffat full opacity for body text (low opacities print lighter than they screen; 0.62 is the floor ever shipped). - Background
#0A0A0A; gradient centers used across the set:#161616,#181818,#191919,#1c1c1c(decorative only, near-invisible in print).
Type
- Font: Barlow Condensed (SIL OFL), weights 300/400/700/900 across the set, loaded via
@import url('https://fonts.googleapis.com/css2?family=Barlow+Condensed:wght@700;900&display=swap')in<defs><style>— the&MUST be escaped&, and thewght@...list must include every weight the file actually uses (a missing weight falls back to synthetic rendering). - Fallback stack:
'Barlow Condensed','Arial Narrow',Impact,sans-serif. Note: the 2026 printed PNGs were accidentally rendered in the fallback font and still looked good, so the design survives both. - Hierarchy: one gold hero word/line, 94–130px, weight 900, letter-spacing −1 to −3; supporting lines white, 42–66px, weight 700 (or 400 for connectors like "in a"), positive letter-spacing (2–14).
- Periods: intentional per design —
ship more.andsyllabus.keep theirs, everything else dropped them.
Layout algorithm (vertical centering)
SVG <text> y is the BASELINE. Use: cap height = 0.72 × font-size, descender = 0.20 × font-size.
- Per line: box top = baseline − 0.72·size, box bottom = baseline + 0.20·size.
- Constant visual gap between boxes (13/20/26 units were used).
- Set baselines so (block_top + block_bottom)/2 = 300 (canvas center).
- Logo floats ~28–30 units below block_bottom, EXCLUDED from centering.
- Keep everything ≥35 units (≈3 mm) from the cut edge; long hero words overflow — shrink until they fit (ship more. 110→94, shipping 118→110).
- Known imprecision: letter-spacing adds a trailing space, nudging
text-anchor="middle"text slightly left; measure real bboxes (headless-browser getBBox) if precision matters.
Logo
- Source: https://www.buildpurdue.org/fullbpCOLOR-cropped.svg (curl -L it; web fetchers choke on image content). Local copy:
../assets/buildpurdue-logo.svg(27,682 bytes, viewBox 0 0 375 90, white "build" + gold "purdue", transparent bg, glyphs outlined). - Embed as base64 data URI in an
<image>tag:<image href="data:image/svg+xml;base64,..." x="180" y="..." width="240" height="57" preserveAspectRatio="xMidYMid meet"/>. Never inline its markup (clipPath coordinate-space + id collisions) and never link a file path (breaks in Illustrator and browsers). - Standard size 240×57 centered (x=180); left-aligned variant 220×52 with
xMinYMid meet.
The six shipped designs
| Slug | Text | Hero | Notes |
|---|---|---|---|
| talk_less_ship_more | talk less / ship more. | ship more. 94px | Hamilton riff; replaced stop_talking |
| build_with_people | build with / people who / get it | get it 130px | Replaced iron_sharpens (Anvil association) |
| stop_building_vacuum | stop building / in a / vacuum | vacuum 126px | |
| connections_syllabus | connections / that don't / show up / on a / syllabus. | syllabus. 96px | Only left-aligned one; keeps gold left bar + rule; opacities 0.75/0.62 |
| stop_talking_start_shipping | stop talking / start / shipping | shipping 110px | Superseded but approved |
| iron_sharpens_iron | iron / sharpens / iron | sharpens 108px | Retired (Anvil is a rival Purdue space) |
Naming: sticker_<snake_case_slug> - <project>.svg/.png.
Brand voice (for new designs)
Lowercase everywhere. Builder/anti-talk culture: shipping over talking, community over solo ("we help people find each other" — approved direction, never built). Dark mode, students as heroes, approachable over polished (Jason Tennenhouse brand direction, Mar 2026). Deferred concepts on file: bee/hexagon/honeycomb rebrand, bell-tower patent drawing. Avoid: anvil references, purely negative framings (team prefers positive flips).
03 Illustrator PlaybookThe fast path for rectangle stickers, plus every gotcha hit doing it for real.
Reference
Illustrator Playbook
The proven fast path (rectangle stickers from PNGs)
- New File: Width 18 in, Height ~4 in (enough for the sticker row; artboard gets trimmed later), CMYK, Raster Effects High (300 ppi).
- File > Place… > pick the PNG > SINGLE CLICK on the artboard (never click-drag; dragging free-stretches it).
- Immediately click "Embed" in the top control bar (Place links by default; linked files throw "Could not find the linked file" later).
- Repeat for each design. One copy per design is enough.
- Select each image; in Transform panel lock the chain/link icon, set W to the target inches (H follows). Arrange in a row/grid; small gaps or touching are both fine — the cutter only follows the CutContour boxes.
- Load the cut swatch: Window > Swatches > Swatch Libraries menu (bottom-left icon) > Other Library… > open
../assets/RolandVersaWorks.ai. - Per sticker: press M (Rectangle tool), draw a box around it; press V, select the box; Fill = none (X to focus fill, then /), Stroke = the magenta CutContour swatch (X to focus stroke, click swatch). Stroke width 0.1 (unitless in the video; 0.1 pt on default settings — the swatch is what matters, not the width). Size the box to the sticker's exact dimensions in Transform (chain locked) and center it over the art (select both > align tools). For the BuildPurdue rounded-corner designs, see the cut-path caveats in
design-system.md(round the cut rect or offset it). - Move all cut rectangles to their own layer: Window > Layers > + for a new layer > drag each <Path> entry onto it.
- Trim artboard: Shift+O and drag edges tight, or Window > Artboard > Fit to Selected Art.
- File > Save As > Adobe PDF > keep "Preserve Illustrator Editing Capabilities" checked > Save PDF. Name it FirstName_LastName_Sticker.
Gotchas hit in the real session
- SVGs with embedded data-URI images (like the BuildPurdue stickers, whose logo is a base64 <image>) DROP the logo when opened or placed in Illustrator, and trigger the "Could not find the linked file" dialog. Use the rendered PNG instead — this is why the pipeline renders PNGs. SVGs whose text uses webfonts (@import) also lose the font in Illustrator.
- "Could not find the linked file. Choose/Ignore": the file was placed as a link. Re-place and click Embed, or keep the file at a stable path. Ignore makes it import minus the linked parts.
- Distorted/stretched art: it was click-dragged during Place or scaled with the chain unlocked. Single-click to place, Shift-drag or locked-chain Transform to scale.
- Blank-looking artboard after layer juggling: check you didn't drag the art off-canvas; Ctrl+Z back.
- Checking a sticker's size: select it, read W/H in the Transform panel (Window > Transform if hidden).
Irregular/text shapes (official full workflow, not needed for rectangles)
Duplicate art > Image Trace preset Silhouettes on the copy > Expand > Ungroup > Release > keep outermost shape, delete the rest > Shift+X swap fill/stroke > duplicate the outline (one for clipping, one for the cut) > align first outline over art > Make Clipping Mask > optional Offset Path (0.05-0.17 in) on the second outline > align it > stroke it with CutContour > move to its own layer > resize both together > trim artboard > save PDF. Full official wording: raw-guide-text/guide_10391398.txt.
04 Design DecisionsWhy each design says what it says, and what was deliberately removed.
Reference
Design Decisions
Pipeline in one paragraph
Logo curled from https://www.buildpurdue.org/fullbpCOLOR-cropped.svg → base64 data URI → sticker SVGs hand-authored (Python f-strings, no layout engine; vertical math from cap-height 0.72x / descender 0.20x heuristics) → previewed via cairosvg at 384×384 (which silently used a fallback font — see gotcha 1) → visually QA'd and iterated. Delivered files: sticker_<slug> - buildpurdue.svg/.png, 2x2 in, viewBox 600.
Design status and why (the part that prevents mistakes)
talk_less_ship_more— CURRENT. Replaced stop_talking_start_shipping after team feedback asked for a "Hamiltonesque" flip ("talk less, smile more" riff). Keeps its period.build_with_people("get it") — CURRENT. Replaced iron_sharpens_iron.stop_building_vacuum— CURRENT (team suggested a positive reframe like "build in community"; never built).connections_syllabus— CURRENT. From Elliot's Night Shift copy. Only left-aligned design, only one keeping a rule + left bar. Keeps its period.stop_talking_start_shipping— RETIRED (superseded by talk_less).iron_sharpens_iron— RETIRED: "sounds like an anvil slogan" and The Anvil is a competing Purdue space. Do not reprint.
Approved-but-never-built directions: "we help people find each other" (the team's unified value prop), positive reframes ("connections beyond the classroom", "build in community"). Deferred: bee/hexagon/honeycomb rebrand, bell-tower patent-drawing concept.
Elements deliberately removed (don't reintroduce)
Gold horizontal rules between lines (kept ONLY on connections), corner brackets, strikethroughs, tiny "pip" circles, the 1px inner accent ring (replaced by the single 5-unit gold ring), the "Cohort" label lockup (four centering attempts, dropped), gray/low-opacity text (must be full white; 0.62 opacity is the shipped floor, connections only), trailing periods everywhere except ship more. and syllabus..
Brand context (Slack research, Mar-Apr 2026)
Jason Tennenhouse branding direction: approachable over fancy, students as heroes, flexible/messy over polished, lowercase, dark mode; "density + unstructured collisions > orchestrated collaboration". Brand assets Drive folder: "ALL Logo Stuff" https://drive.google.com/drive/folders/14netUXCjH4GIsaaTVwtj291PbbyzzxMt (Color/Black/White logo variants, naming type-variant-buildpurdue.svg/png). His concept-board walkthrough was 2026-05-14 — the brand may have moved after these stickers were finalized.
Gotchas (verified, condensed)
- cairosvg does not load Google Fonts — every 2026 preview/PNG used a fallback font and every width estimate was wrong. Render with headless Chrome (this skill's script) or install the font locally.
- Text is never outlined in the shipped SVGs; they depend on the Google Fonts @import at render time. Barlow Condensed is SIL OFL — outlining is safe if ever needed.
- Never inline the logo's SVG markup (clipPath coordinate space + Inkscape id collisions); always the base64 data URI. And Illustrator drops data-URI images — hence PNG hand-off.
- Logo gold is
#fabb18;#F5A623was visibly wrong next to it. Sample, don't assume. <text>y is the baseline; letter-spacing adds a trailing space that shifts centered text slightly left (known, unfixed imprecision in the shipped files). Measure real bboxes (getBBox in a browser) if a text+image lockup ever needs true centering.- Long hero words overflow: shipping 118→110, ship more. 110→94, stop building 82→60. Keep ~35 units (≈3 mm) clear of the cut edge.
- Elliot's voice-dictated messages contain transcription artifacts ("Build Pretty logo" = buildpurdue logo, "specters" = stickers, "Shit More" = ship more).
- Standing preference from the sessions: present PNGs, not SVGs, when showing designs.
Use it now. It's free.
Works on all platforms. Pick yours and get set up in under a minute.
Claude.ai
Download & upload in 60 seconds
Download the zip, then open Claude.ai to upload it.
Download the zip below. With JavaScript enabled, Claude.ai opens in a new tab if your browser allows it. Otherwise, use Open Claude.ai.
Click the + button in the skills column on the left.
Select Create a skill.
Select Upload a skill and upload the zip.
Start your sticker run by running /estack-purdue-stickers.
Claude Code
Run one command in any terminal
Works anywhere Node.js is installed — your project directory, home directory, anywhere.
Open your terminal app and run this command.
npx elliot-stack@latest
Run the command.
Start Claude Code by typing claude in your terminal.
Start your sticker run by running /estack-purdue-stickers.
ChatGPT / Other
Paste a prompt — the AI does the rest
This prompt tells the AI where to fetch current instructions from the live site. No installs. No version lag.
Copy the prompt below.
Preview prompt
# Purdue Knowledge Lab Sticker Production Take a sticker idea to submission-ready files. The proven pipeline (May 2026: four BuildPurdue designs prepped and approved, two physically printed): design as SVG → render transparent 300 DPI PNG → prep → submit through the Lab's booking site. Read these references as needed: - `https://elliotdrel.com/e-stack/purdue-stickers/references/official-requirements.md` — the Lab's hard rules and file spec (distilled; raw pages in `references/raw-guide-text/`, indexed there) - `https://elliotdrel.com/e-stack/purdue-stickers/references/design-system.md` — the BuildPurdue sticker design system (colors, fonts, layout algorithm, cut-path caveats, brand voice) - `https://elliotdrel.com/e-stack/purdue-stickers/references/illustrator-playbook.md` — the Illustrator prep steps + real-session gotchas - `https://elliotdrel.com/e-stack/purdue-stickers/references/submission.md` — the booking-site walkthrough (primary), email fallback, ready-to-fill email template - `https://elliotdrel.com/e-stack/purdue-stickers/references/design-conversation-digest.md` — provenance: design decision history, brand research, gotchas from the May 2026 sessions (trimmed; full digest + raw transcripts in `C:\Users\2supe\Other Claude Code\purdue-stickers\sources\`) Ready-made assets: - `assets/designs/` — all six 2026 BuildPurdue designs as final SVGs (four current, two retired — check the table in `design-system.md` before reprinting) - `assets/examples/` — Elliot's actual sticker PNGs (two physically printed). These are the visual benchmark AND the marketing material: when discussing designs or pitching what this pipeline produces, show these images (Read them / attach them), don't just describe them. See its README. - `https://elliotdrel.com/e-stack/purdue-stickers/assets/buildpurdue-logo.svg` — the logo (also live at https://www.buildpurdue.org/fullbpCOLOR-cropped.svg; curl it, web fetchers reject image content) - `https://elliotdrel.com/e-stack/purdue-stickers/assets/template-sticker.svg` — neutral placeholder-text skeleton to copy-edit (embed the logo per its comments) - `https://elliotdrel.com/e-stack/purdue-stickers/assets/RolandVersaWorks.ai` — the official cut-color swatch library for the Illustrator stage - `references/guide-images/` — all 37 images from the official guide, archived 2026-08-15, indexed in its INDEX.md. The stills (offset-width examples, Glossy/Matte/Transparent, shape/size PNGs) can be shown inline when a visual beats prose; the numbered step GIFs are recordings — you only see frame 1, so give Elliot the file path to open rather than describing them. ## Step 0 — Intake Nail down before designing (ask only for what's missing): 1. Sticker text/slogan and any logo (BuildPurdue logo is at `https://elliotdrel.com/e-stack/purdue-stickers/assets/buildpurdue-logo.svg`). 2. Physical size (default 2x2 in) and count of distinct designs. 3. Finish: Glossy (default for bold/dark designs) / Matte / Transparent. 4. Copyright check: original artwork only, NO Purdue trademarks (Unfinished P, train, etc.) without a license, no third-party logos. Flag problems now, not after design. 5. Allotment math: quantity is set by the operator tiling copies on the 18 in-wide roll, so material length ≈ ceil(copies / floor(18/width)) × height. Example: N copies of 2x2 in → ceil(N/9) × 2 in of roll; the 36 in/month allotment ≈ 162 such stickers. Length also sets the booking duration (30 min per 12 in). ## Step 1 — Design (SVG) Start from `https://elliotdrel.com/e-stack/purdue-stickers/assets/template-sticker.svg` (neutral skeleton) or copy a real design from `assets/designs/`, following `https://elliotdrel.com/e-stack/purdue-stickers/references/design-system.md`. Key invariants for the BuildPurdue look: 600x600 viewBox for a 2 in square, white keyline + gold (#fabb18) inner ring on near-black (#0A0A0A) rounded card, Barlow Condensed (Google Fonts @import, `&` escaped as `&`), logo as base64 data-URI `<image>` (never a file link). For non-BuildPurdue stickers, keep the same technical skeleton (physical-size root attrs, viewBox at 300 units/inch, rounded-rect silhouette, everything self-contained in one file). ## Step 2 — Render and preview Run (path relative to this skill's base directory; needs Pillow + Chrome or Edge): ``` python <skill-dir>/scripts/render_sticker.py design.svg out.png --inches 2 ``` Uses headless Chrome (needed for the webfont + data-URI logo; cairosvg/resvg can't). Output: exact-size transparent PNG, 300 DPI stamped, self-verified non-blank. ALWAYS show Elliot the rendered PNG and get approval before packaging — and eyeball it yourself first (font loaded? logo present? nothing clipped?). Note: a fresh render is true-font Barlow Condensed and will NOT visually match the 2026 physical stickers, which were printed from fallback-font 384px PNGs — both looks are approved-in-practice. ## Step 3 — Package and submit Output folder: `C:\Users\2supe\Other Claude Code\purdue-stickers\output\<YYYY-MM-DD-slug>\` (create it; fall back to a folder next to the design files if that workspace doesn't exist). Produce: 1. Final PNGs, named `sticker_<slug> - <project>.png`, plus the source SVGs. 2. `SUBMISSION-NOTES.md`: per-sticker physical size, finish, quantity wanted, and the sender name for the file-naming rule (FirstName_LastName_Sticker). Then submit — **through the Lab's website; this is the required route**: - Open https://calendar.lib.purdue.edu/space/182313 for Elliot (use the Claude-in-Chrome browser tools when available, otherwise give him the link) and walk the form per `https://elliotdrel.com/e-stack/purdue-stickers/references/submission.md`: pick a green slot sized to the material length, upload the prepped PDF AND the original image files, choose the finish, submit, then wait for the approval email. - If a prepped PDF is required first, follow `https://elliotdrel.com/e-stack/purdue-stickers/references/illustrator-playbook.md` in Illustrator (Purdue IT lab machines have it) — the PNGs + `https://elliotdrel.com/e-stack/purdue-stickers/assets/RolandVersaWorks.ai` are the inputs. Emailing knowledgelab@purdue.edu (template in `https://elliotdrel.com/e-stack/purdue-stickers/references/submission.md`) is a fallback that has worked, but booking still happens on the site. ## Guardrails - Never claim the file is "submission-ready" without having rendered and visually inspected it. - Cut paths (CutContour swatch) only exist in the Illustrator/PDF stage; PNG-only submissions rely on lab staff drawing them — say so, and read the cut-path caveats in `https://elliotdrel.com/e-stack/purdue-stickers/references/design-system.md` before promising edge-to-edge geometry. - The booking form and guide change; if anything looks different from `https://elliotdrel.com/e-stack/purdue-stickers/references/official-requirements.md` (last verified 2026-08-15), re-check the live guide at https://guides.lib.purdue.edu/klab-stickerprinting and update these references. --- ## Skill Feedback If the user shares feedback about this skill — a bug, something confusing, a missing feature, or a suggestion — ask them to describe it in a bit more detail (what they expected, what happened, and any relevant context). Then file the issue using whichever method is available: **If `gh` is installed** (`gh --version` succeeds), create the issue directly: ```bash gh issue create \ --repo ElliotDrel/e-stack \ --title "estack-purdue-stickers: <concise summary>" \ --body "<description from user feedback — expected vs. actual behavior and context>" ``` **If `gh` is not installed**, build a pre-filled URL: ```bash python3 -c " import urllib.parse title = 'estack-purdue-stickers: <concise summary>' body = '<description from user feedback — expected vs. actual behavior and context>' base = 'https://github.com/ElliotDrel/e-stack/issues/new' print(base + '?title=' + urllib.parse.quote(title) + '&body=' + urllib.parse.quote(body)) " ``` Share the printed URL with the user and offer to open it in their browser. They can also click it directly, review the pre-filled title and body, and click **Submit new issue**.
Open your platform and paste the prompt.
Start your sticker run.
Practice giving AI a task with the AI use worksheet
Purdue Knowledge Lab Stickers ships in E-Stack, a set of 21 free skills installed by one command. See the whole stack.